When it comes to changing up your look, your eye makeup is one of the easiest ways in which you can do this.
Whether you have five minutes to spare or an entire hour, here are eight amazing eye makeup looks that you should definitely try.
Rainbow Eyes
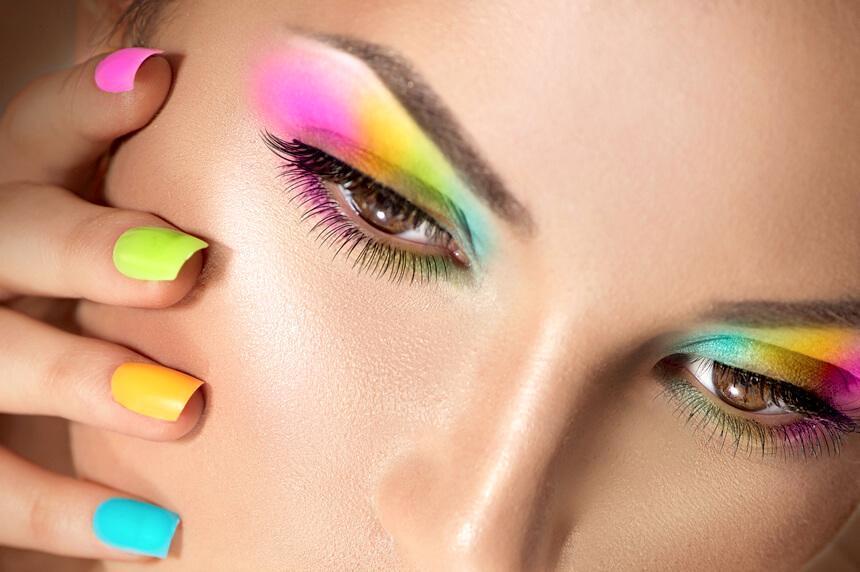
Rainbow colors have been so on trend lately, with everything from fashion items to hair dyes boasting all of the colors of a rainbow.
Wondering how to apply this trend to your eyes, without all of the different colors mixing together?
The answer is easier than you think…
Begin with a healthy base, which you can achieve through the use of an eye primer. This will coat the skin on your eyelids, not only giving your makeup a base on to which it can grip, meaning that it will last for longer, but also enabling the colors you use to shine out in a much more vivid way.
You then need to use brightly colored eye pencils to map out the various rainbow sections you want around your eye.
Then, simply fill in the gaps with matching shades of eyeshadow.
The trick here is when it comes to blending…
Each eyeshadow shade should only blend with the next at the point at which they meet, and nowhere else. In order to accomplish this, you will likely need to use a few different brushes; one to blend the pencils in, one to press the eyeshadow over the top, and slightly larger brushes to blend the eyeshadows together.
Wondering where each color should actually go?
This is completely up to you. For a brighter and perkier look, try to keep the lighter colors, such as yellow, for your tear duct, as this acts almost like a highlighter to open up your eyes.
A Bright and Bold Cat Eye
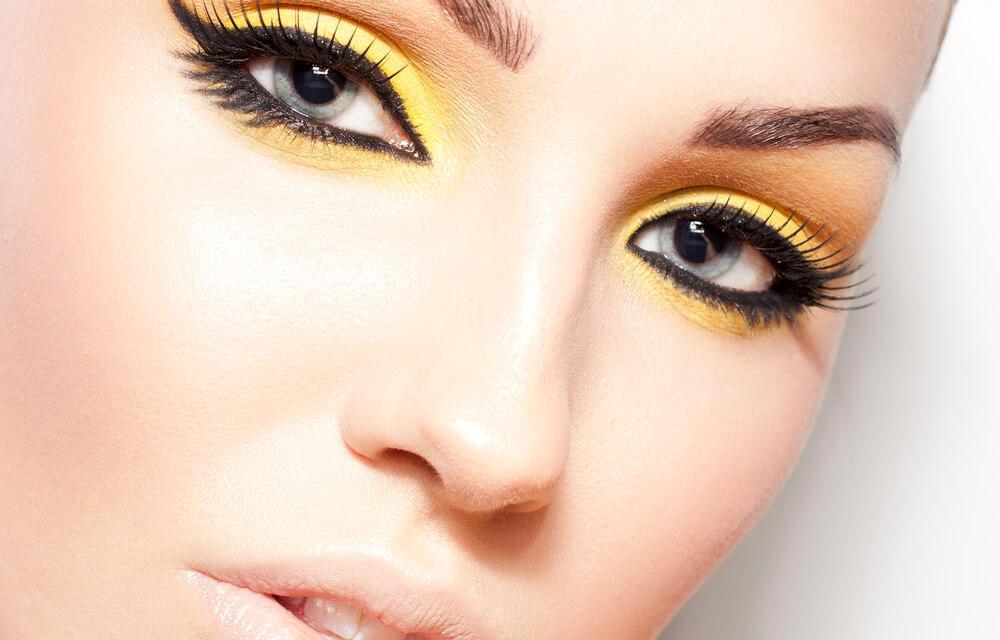
The cat eye is such a classic eye makeup look, but this style takes it a bit further by adding in a vibrant shade of yellow, to really make your eyes pop even more.
The cat eye itself is pretty easy to draw on…
After applying an eye primer, use a liquid liner to line your upper lash line, using small and thin strokes. As you progress, you can gradually increase the thickness of each stroke.
Wondering why you shouldn’t start off with thicker strokes?
Because this makes it much easier to make a mistake, whereas starting off small allows you to build the look up perfectly.
As you reach the outer edge of your eye, imagine that your lower lash line has been extended, and then create the cat eye flick at this part.
Do you seem to always mess the flick up?
Try dabbing on some dots instead with your liquid liner, so that you can perfect the placement of your flick. Then, simply join these dots together to create a solid line.
Of course, with everybody’s eye shape being slightly different, you do need to adjust the way in which you draw on a cat eye so that it really accentuates your own eyes.
How?
Here are a few guidelines to follow depending on your eye shape:
- Wideset eyes – keep the flick short and pointed upwards, so as not to widen your eyes even more
- Closeset eyes – extend the flick outwards so that it is longer and more horizontal, as this will widen up your eyes. Keep the eyeliner away from the inner corners of your eyes
- Small eyes – smudge your cat eye a little bit, as lines that are too tight will make your eyes seem smaller. It can sometimes be easier to use a liquid eye shadow rather than a liquid liner for this
- Hooded eyes – you will need a thick line, and may be best off avoiding your lower lash line, as this can make your eyes appear smaller
- Almond eyes – accentuate the line at the outer edge, making your flick more dramatic
- Monolids – a thick line close to your lash line will help to give your eyes some extra definition
Glitter Eyeliner
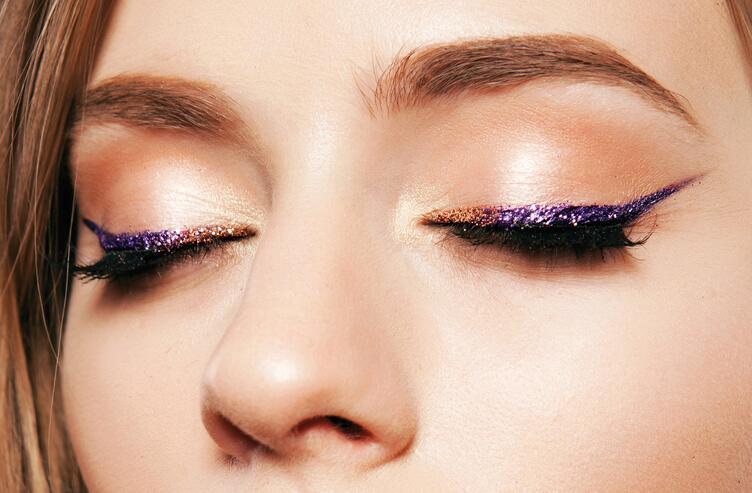
While many may automatically assume that glitter eyeliner is childish and tacky, this all depends on how you apply it.
Yes, slathering your eyes with a glitter eyeliner will definitely look immature, but applying it in a careful and precise way will give your look an ethereal feel, and this works well for both day and night.
The easiest way to put this look together is by investing in some eye glitter, but you will also need to purchase some glitter adhesive to use along with this.
All you need to do is dip a liner brush, or even a small thin paintbrush, into the adhesive, before dipping it into the eye glitter.
Run this brush along your upper or lower lash line, in the same way that you would if you were applying a regular eyeliner.
If you want your eyes to stand out even more…
Try applying some black eyeliner first, and then add the glitter on over the top of this.
Feathered Lashes
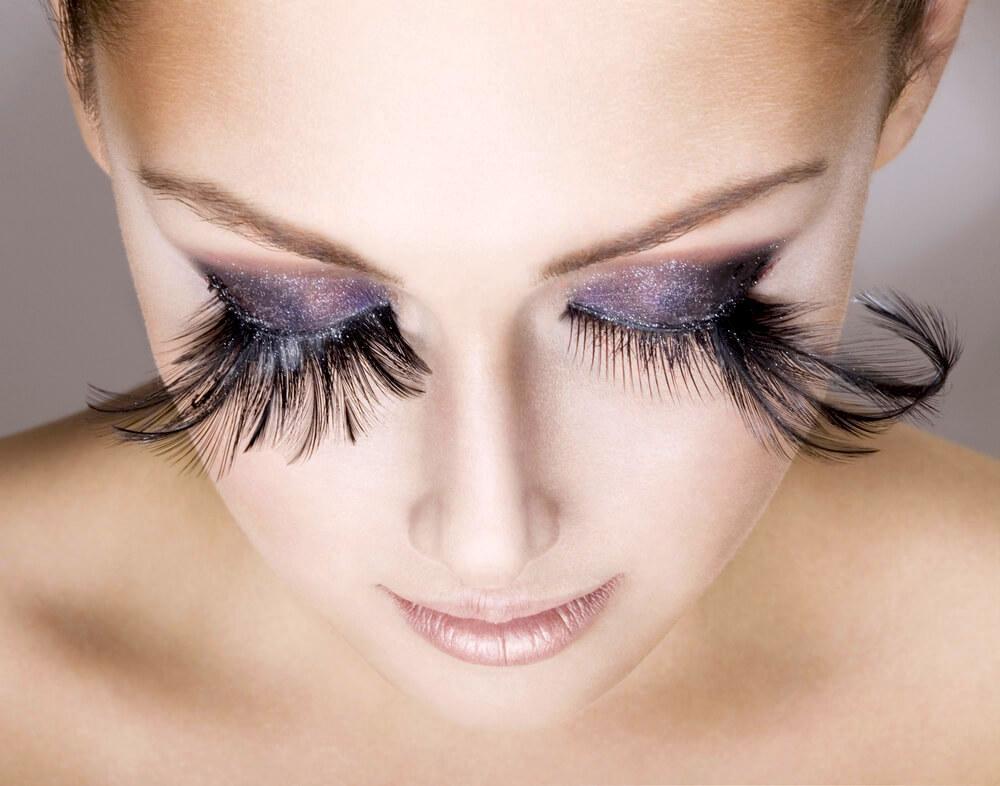
For a really fun look that makes a big statement, give feathered lashes a try.
While this may not be something you would wear on a daily basis, it is perfectly suited to a special occasion when you are needing something a bit more glamorous.
The great thing about this look is that, when it comes to purchasing your feathers, there are so many different options available. Whether you want something minimal or something bolder and more colorful, you will no doubt be able to find feathers that work for this.
Wondering how to apply feathered lashes?
They work in the same way as other false lashes. All you need to do is apply some eyelash glue directly to your lash line, before placing the false lashes onto your eyes.
You will more than likely be best off applying these lashes at the end of your makeup routine, going back and lining your eyes once again once the lashes are on. Apply a touch of mascara underneath your false lashes will also help them to blend in with your natural lashes in a much better way.
Red Eyeshadow
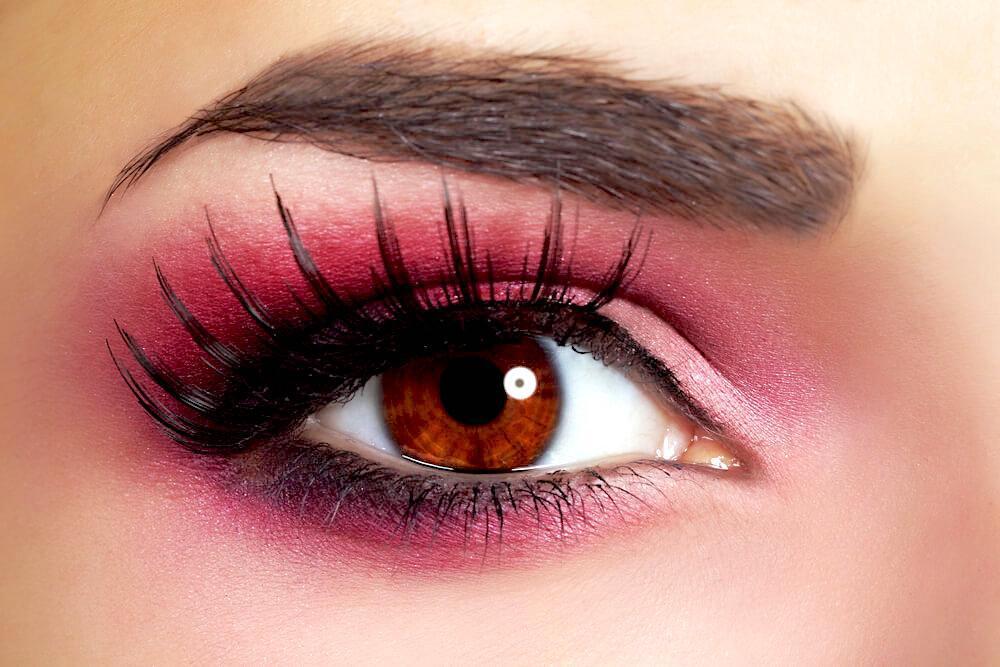
While red lips, and even red cheeks, are looks that are worn quite commonly, red eyeshadow is much rarer.
Why?
Because, when applied incorrectly, the red can make your eyes themselves look red, giving you a finish that would be better suited to a vampire.
Of course, when applied in the right way, red eyeshadow will give your eyes a warm and colorful touch, and can really accentuate an outfit.
You are probably now wondering…
How do I apply red eyeshadow in the correct way?
Well, to begin with, you need to make sure that there is no red at all in the whites of your eyes. If there are, the red eyeshadow will only highlight this, and this is something that you definitely don’t want.
When actually applying the shadow, try to do it in a way that elongates the shape of your eyes, sweeping it outwards and upwards. This helps to lift your eyes, rather than allowing the red to make your eyes look tired.
Pairing your red shadow with a smoky eye will also help to keep it on trend, while giving it a more dramatic feel.
Don’t be afraid to also experiment with different shades of red, as each one will work differently against your skin tone and eye shape and color. From bright reds to a darker burgundy to matte orange shades, there is plenty out there to play around with.
One more thing to keep in mind…
Unless you are ultra confident when it comes to applying makeup, keep the rest of your makeup minimal when rocking red eyeshadow. This allows the red to really stand out, and will prevent your entire look from appearing to costume-y.
A Smoky Eye with a Twist
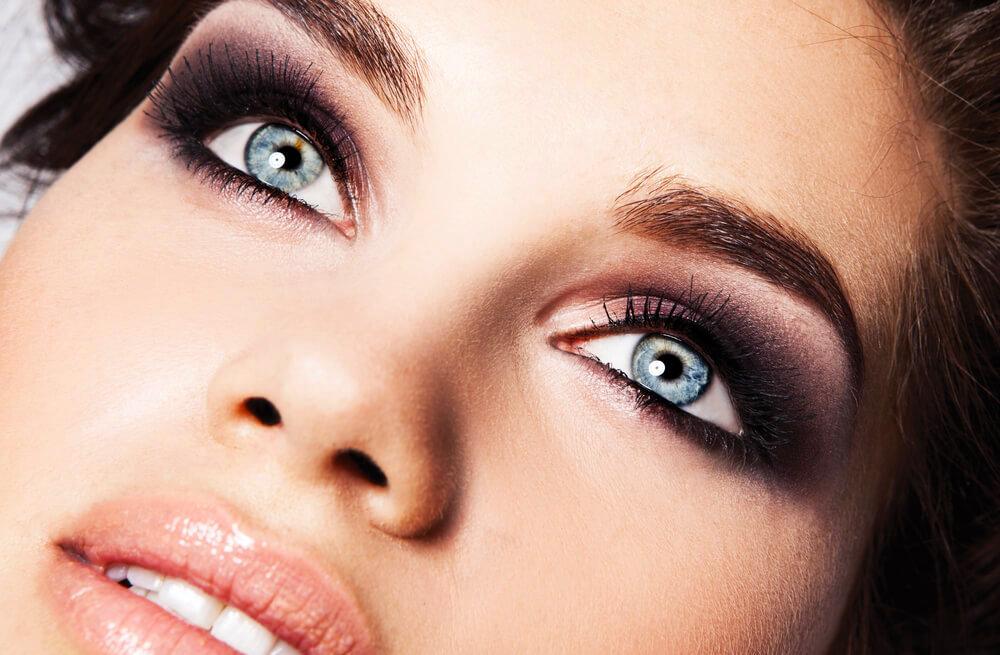
The smoky eye is such a classic look, and there are hundreds, if not thousands, of tutorials out there on how you can create this.
When it comes to classic looks such as this, they are fantastic for when you need something fail-proof, but are also great for adding in your own spin.
Wondering how to do this?
The easiest way is by experimenting with different colors and textures. While grays and blacks may be most common when it comes to a smoky eye, try adding in some different colors, whether this may be purples, reds, coppers or blues.
The one thing to keep in mind when playing around with different colors is that you need to find one that complements your skin tone.
How can you do this?
Here are a few guidelines:
- Cool skin tones – cool shades of pinks, purples, blues, greens and grays will work well for you
- Warm skin tones – warm shades of oranges, peaches, bronze, brown and gold will complement your skin tone
- Neutral skin tones – just about every color will work for you
Going for Gold
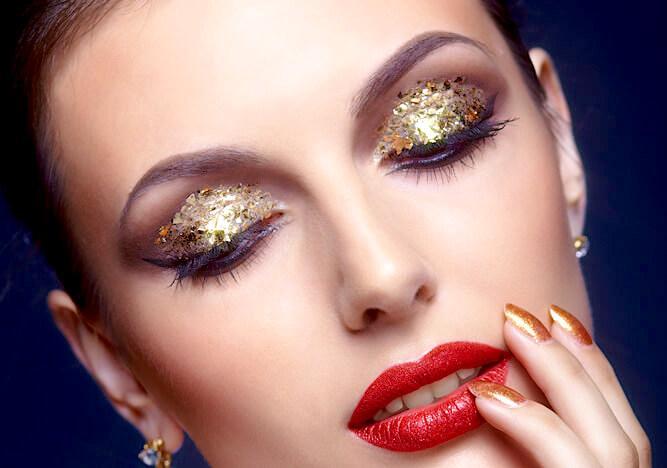
This is another look that is perfectly suited to a special occasion, and while this may take a bit of time and patience to achieve, the outcome is more than worth it.
To create this effect, you will need to purchase some gold leaf, either online or from a local craft store. While imitation gold leaf may be cheaper, you would be best off opting for real golf leaf, as this is the safest to use around your eyes.
Once you’ve got it, you will need to break the gold leaf sheets up into smaller pieces.
How big should they be?
This is completely up to you, and depends on the final look you are going for. However, a variety of sizes is usually best, as this will give your eyes more texture. It is also much harder to apply identically sized pieces in a uniform way.
When it comes to actually applying the gold leaf to your lids…
The pieces will usually stay on on their own, but, for added staying power, you would be best off using some eyelash glue too. Simply dot a small amount of the glue either on to your eyes or on to the gold leaf itself, and then use a pair of tweezers to carefully place each piece on to your lids.
Since this is quite an extravagant eye makeup look, keep the rest of your makeup minimal, but don’t be afraid to add on a few layers of mascara to make the gold pop even more.
Wondering what to do with your lips?
Keep them nude, because any colors that you use here will only detract or compete with the gold on your eyes.
There is so much versatility when it comes to eye makeup, making this something that is so much fun to experiment with. Whether you are seeking something down to earth and simple, or extravagant and over-the-top, playing around with your eye makeup can really give your style a whole new dimension.



Leave A Comment