Nail art is so much fun to experiment with, but if this is something new to you, then you would be best off starting with simpler designs.
Need some inspiration?
Here are 12 basic nail designs that will work for just about every occasion:
Two-Toned Floral Inspired
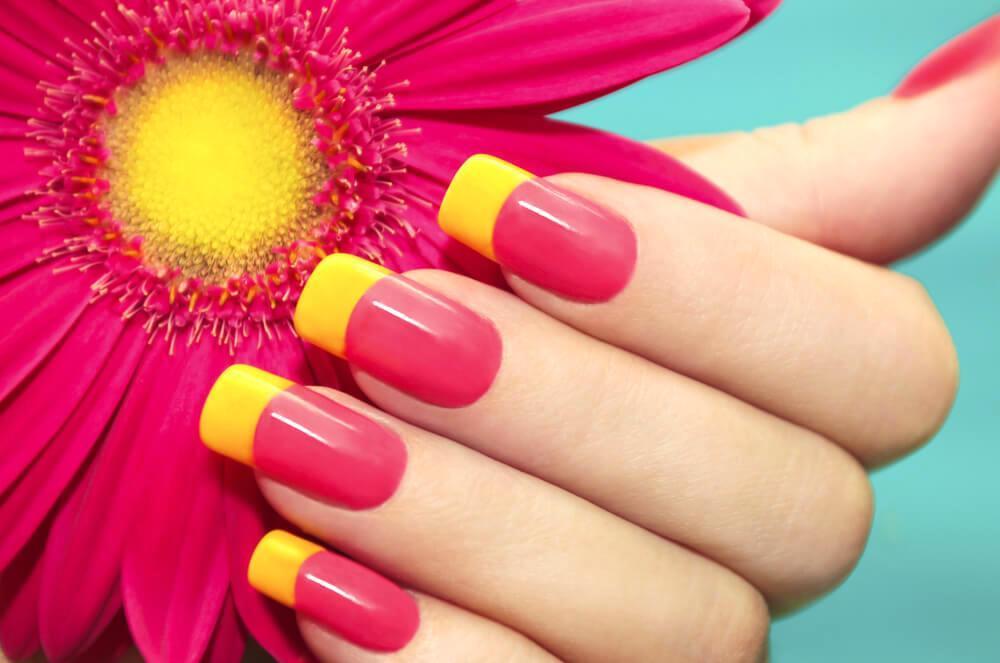
Do you love flowers?
If so, what’s your favorite?
Have a think about your favorite flowers, and pick a few that have stand-out colors.
Then, replicate these on your nails.
Flowers usually have such contrasting colors, and choosing from these will give your nails such a bright and vibrant feel.
Not sure which flowers to go with?
Here are a few floral-inspired color combinations you could try:
- Lilac flowers – lilac and white, or lilac and a darker shade of purple
- Violas – purple and white, or purple and yellow
- Hippeastrum – strawberry red and cream
- Hydrangea – purple and blue
- Daisy – yellow and white
- Gerberas – purple and orange, or yellow and orange
Once you have picked a color combination, don’t forget to experiment with the placement of these colors. Start off by placing one color at the bottom of your nails and another at the top, before swapping this around to see the different effects it will bring.
The Little Black Dot
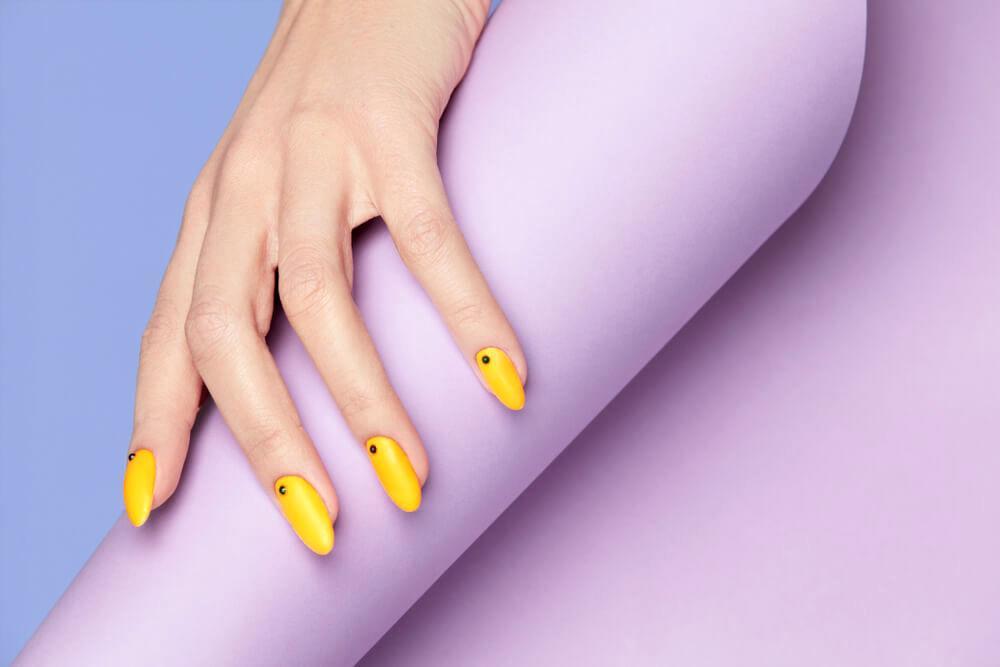
For those who appreciate minimalist designs, the little black dot is perfect for you.
While it may seem extremely simple, this is actually such a versatile design, because you are free to choose whichever shade you want for the background color.
To really make a statement, pick a background color that is bright and bold, as this will beautifully complement the black dot.
Want something slightly more subtle instead?
Place the little black dot on a nude or natural nail, allowing it to really speak for itself.
Don’t like black?
There is no reason why you cannot opt for a different color for the dot, so long as it contrasts enough with the background shade you have chosen.
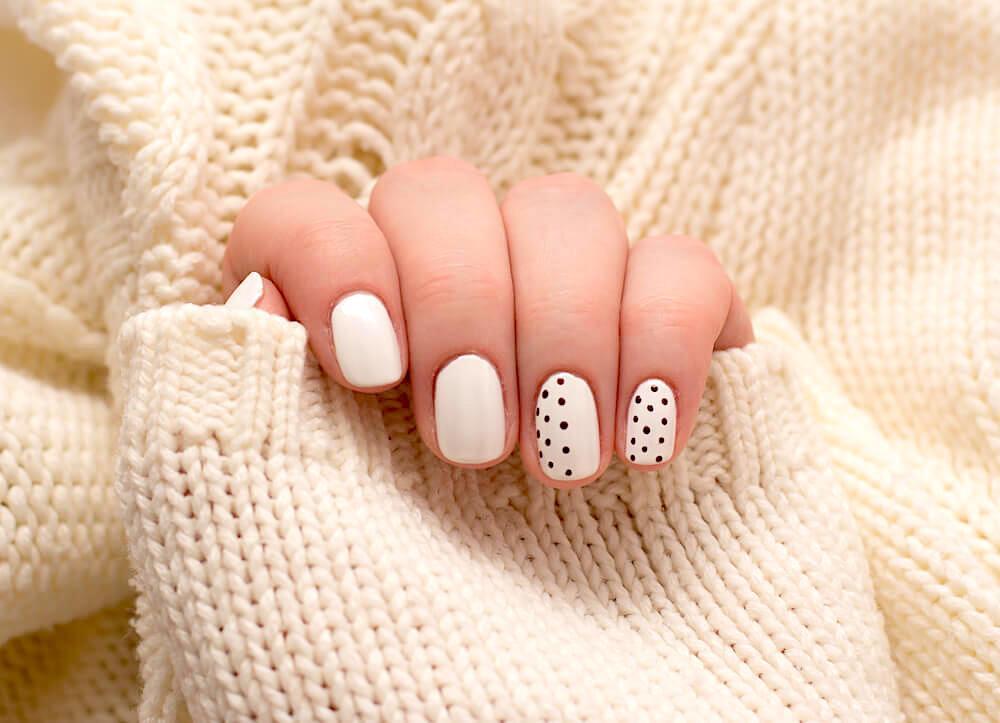
Pink Polka Dots
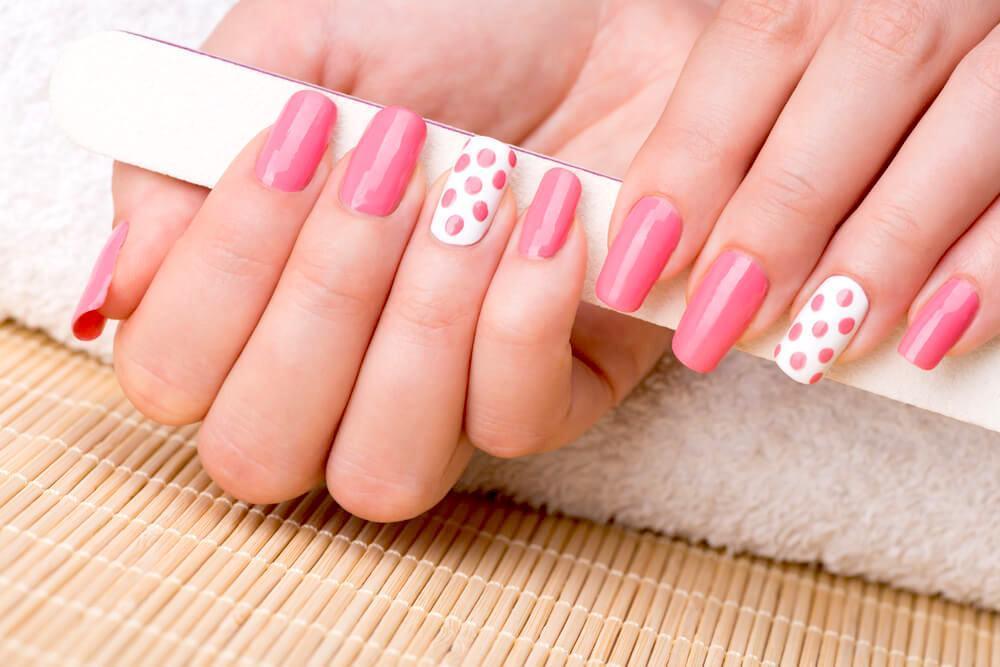
This is quite a toned down design, making it ideal for wearing on an everyday basis. The soft, pastel hues of the pink keep this design looking quite feminine, while the polka dots on just one nail give it a boost of personality.
Wondering how to get your polka dots looking perfectly round?
You don’t need any fancy tools. Instead, all you need is a toothpick, or even a bobby pin, although if you are using a toothpick you will need to break the end of first, so that it is not quite so pointy.
Simply dab a small amount of nail polish onto a piece of paper, and then dip your toothpick or bobby pin into this. Then, dab the toothpick onto your nails to create the polka dots, finishing off with a clear top coat so that the design lasts for longer.
A Pastel Rainbow
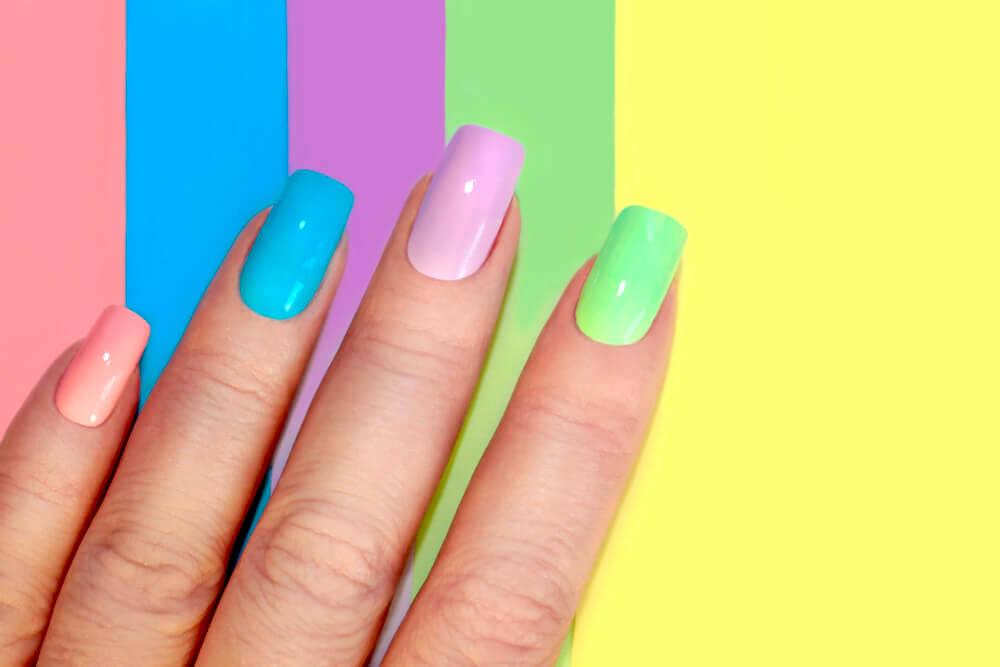
For a fun, colorful and incredibly easy design, give a pastel rainbow a try.
Rather than opting for brighter and bolder shades, the pastel colors keep this otherwise loud look quite muted, making it suitable for a wider variety of occasions.
All you need to create this look is a few different pastel shades of nail polish, preferably in the colors of the rainbow.
Whether you decide to opt for a different color for each of your ten nails, or pick five colors and have both hands matching, this is a nail look that you can easily put together in just a few minutes.
Send a Message
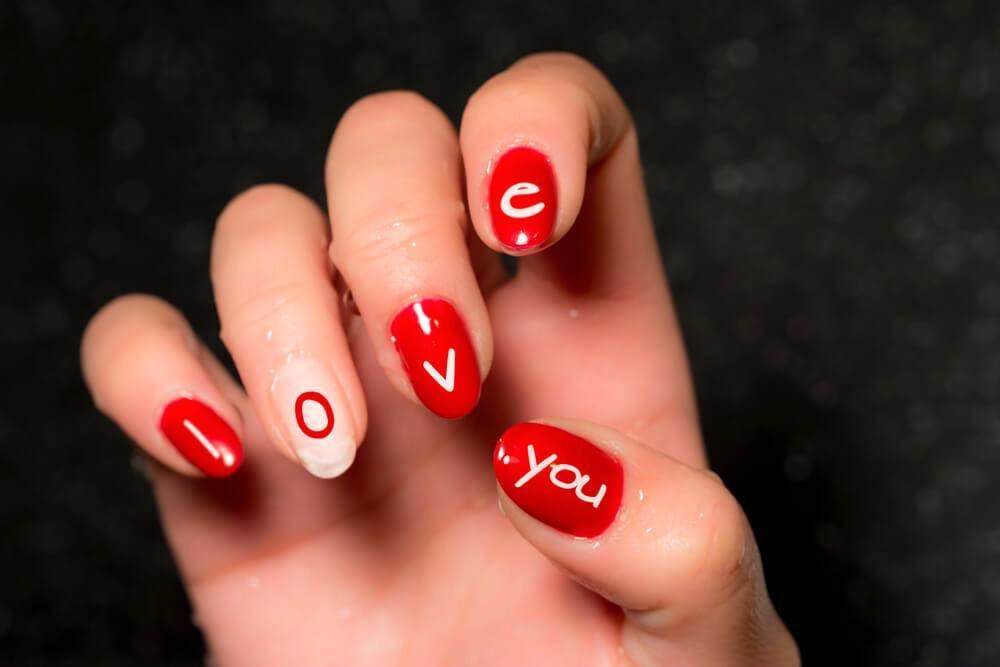
Got something to say? Say it with your nails!
This is quite an unconventional design, but it is definitely such a creative way to get a message across.
Wondering how to actually go about writing on your nails?
A striper brush, or even a thin and pointed paintbrush, will make this task so much easier.
Of course, since you will be working freehand with a brush, it never hurts to practice on some paper first, using the same nail polish that you plan on using on your fingers.
One more tip…
Make sure that you choose contrasting colors for the letters and the background, preferably a darker shade for the letters and a lighter one for the background. This will help to ensure that your message really stands out and is easily legible.
Fruit-Inspired
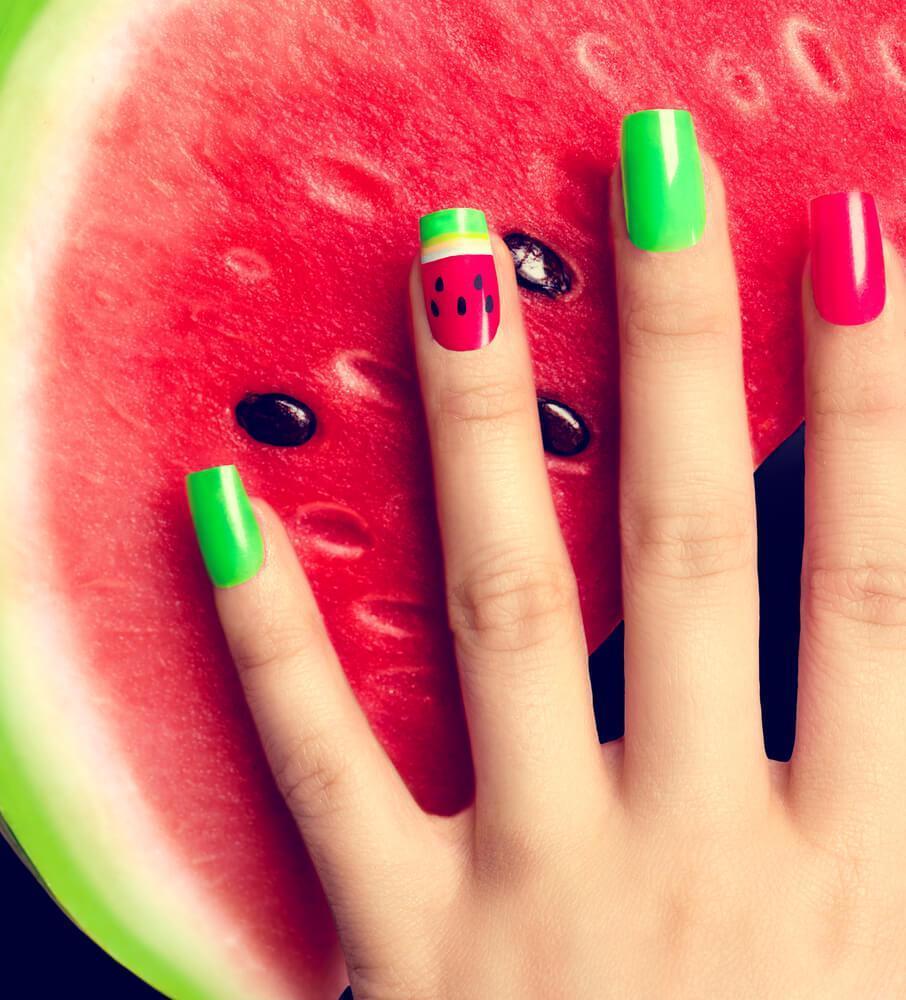
This design may seem quite complex, but it is actually pretty simple, as you are only spending time on one nail, leaving the rest as solid colors.
As you can see, this particular design is inspired by a watermelon, making it a great one for the summer months.
You will need five colors for this style, but could also get away with just using four, omitting the yellow stripe below the green tip.
Don’t like watermelons?
Let yourself be inspired by your favorite fruits, whether this may be strawberries, kiwis, pomegranates, or anything else.
Fading Polka Dots
This nail art design is similar to the polka dot design mentioned above, but is a slightly more interesting variance.
Rather than having polka dots on just one nail, try having them on two or three. Begin with your little finger, covering this nail in polka dots. Then, move on to your ring finger, and cover either three quarters or half of this nail with polka dots.
In order to keep this style suitable for every occasion, try to pick classic colors, such as a cream or soft pink background, and then black for the polka dots.
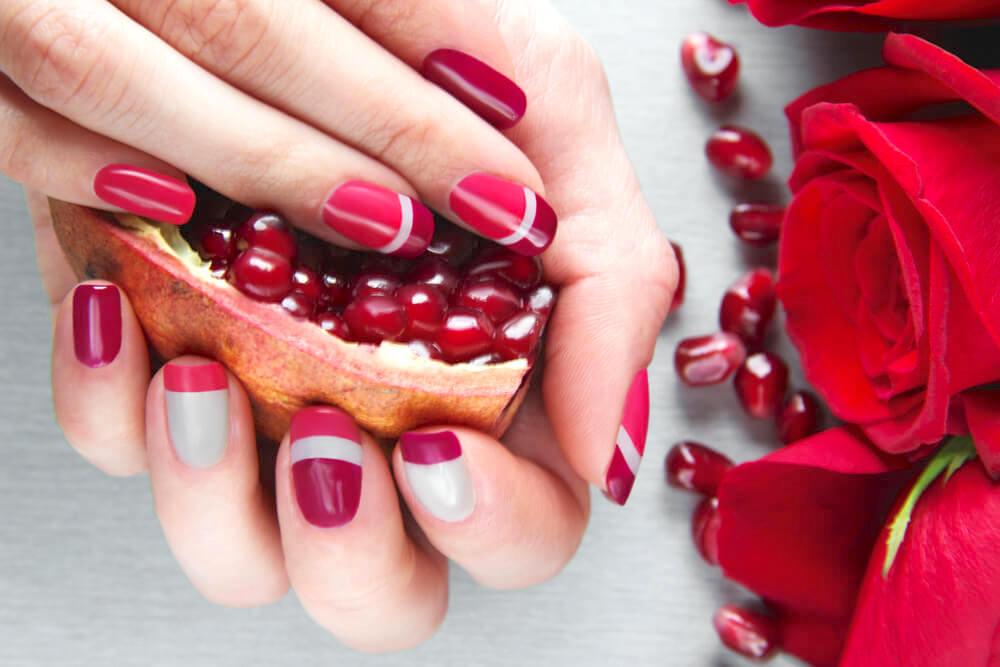
Border Nails
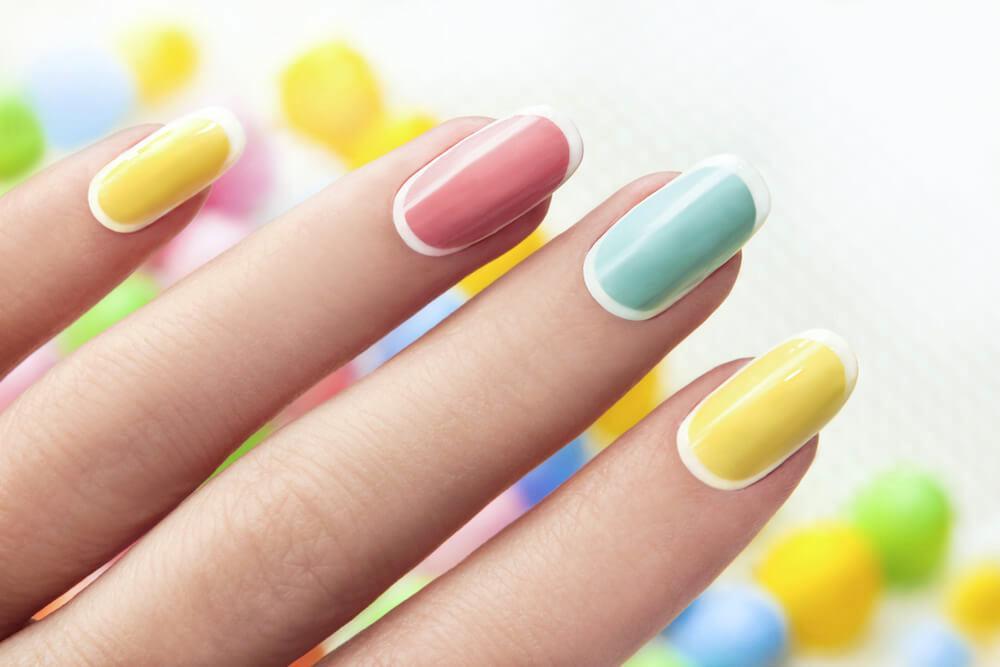
Border nails seemed to come out of nowhere but became extremely popular very quickly,
Want to know how to create them?
Here are the steps to follow:
- File your nails into shape and push back your cuticles, making sure not to cut them
- Apply a layer of base nail polish
- Apply two coats of an opaque white nail polish
- Pick another color, and then paint your nail as you usually would, but leave a white border around the sides and bottom edge, trying to also leave a U-shape at the top
- Use a striper brush to give your nails a white French tip, as this will help to really enhance the border that you have created
- Finish off with a top coat to lock in all of your hard work
Topped with Sprinkles
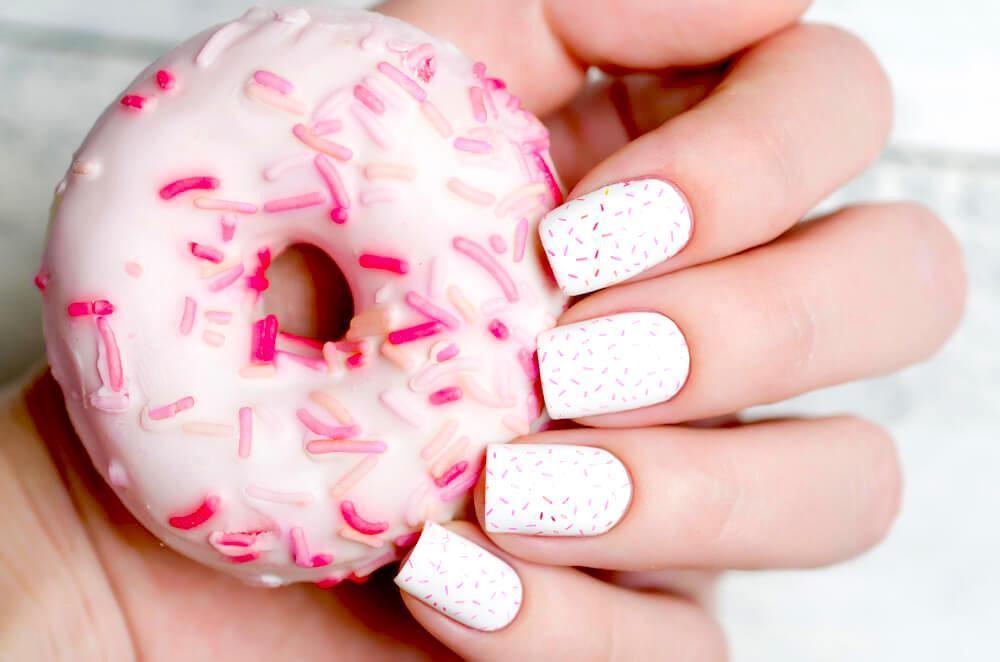
Do you have a sweet tooth?
If your answer is yes, then this nail design is perfect for you.
Begin by applying your base coats, opting for a light shade, such as a pale pink or a cream, as this will help the sprinkles to stand out better.
Then, pick a slightly darker color, such as a dark pink or a purple. Dip a nail dotter into your chosen color and then place this onto your nail, making a short flicking motion with your wrist so that the dotter drags against your nail, creating a thin sprinkle rather than an actual dot.
If you would like to liven this look up even more…
Choose another similar, complimentary, color, and create sprinkles with this color too.
Once your sprinkles have dried, finish the look off with a top coat.
Wondering if you can skip out on the top coat?
You can, but a top coat really does help. As it dries, it hardens significantly, which protects your nail color from scratches or chips. Not only that, but a top coat will also strengthen your nails, while keeping the colors you have chosen looking bold and vibrant. A top coat can extend the life of your nail art by around two weeks, making this something well worth doing in order to preserve your hard work.
Heart Tips
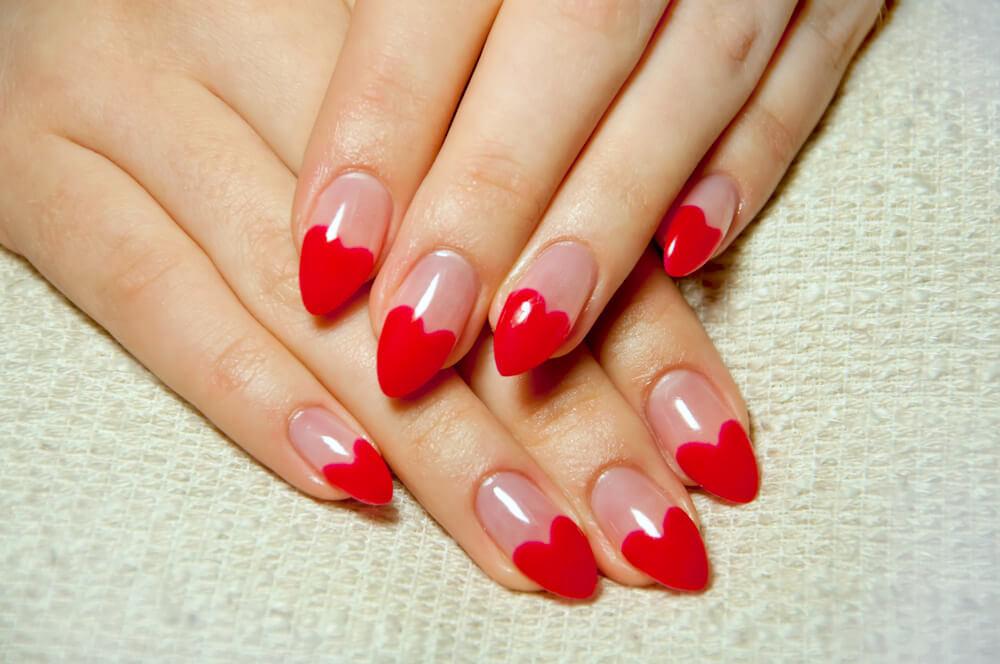
Are you looking for a nail design perfect for a romantic occasion?
If so, heart-tipped nails are the way to go.
Here are the steps to follow:
- Begin by filing your nails so that they form an almond shape, with the tips being more pointy than round, as this is what will form the base of the hearts
- Push back your cuticles and apply a base coat to your nails
- To paint the hearts, begin with just one side of the heart, painting a diagonal oval that runs from one side of the nail and almost reaches the other side
- Do the same with the other side of your nail, so that the two oval shapes join together to create a heart
- Finish the design with a top coat
Don’t forget…
You can always experiment with different colors, not only with the heart but also the main color of your nails.
Black, White and Geometric
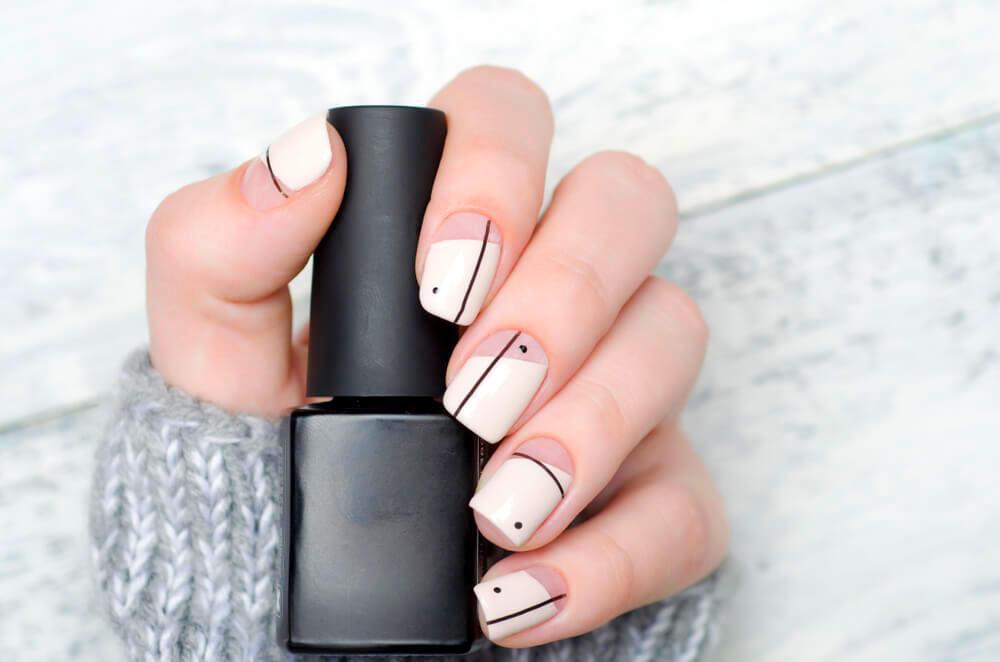
This design is perfect for those who prefer a clean, sleek and modern aesthetic, and is actually quite easy to create.
You only need two colors for this look; black and white, as well as a thin brush to create your geometric lines.
As you can see, the white polish needs to be applied first. Run this down your nail, stopping three-quarters of the way and moving diagonally down, so that the base of your nail is left bare. Of course, if you would prefer a fully white nail then this would also work too.
Next, dip a thin brush into black nail polish. Run this along your nail, creating a thin black line. The placement of each line is completely up to you, so feel free to experiment with this.
Then, use a dotter to create a black dot in the corner of each nail, again alternating when it comes to the exact placement.
Finish off with a top coat to help this design last longer.
Horizontal Stripes
This look is similar to the two-toned design mentioned earlier, except that it includes more colors and stripes.
Begin by choosing the colors you want to use.
Not sure what to opt for?
A color wheel can really help at times like this…
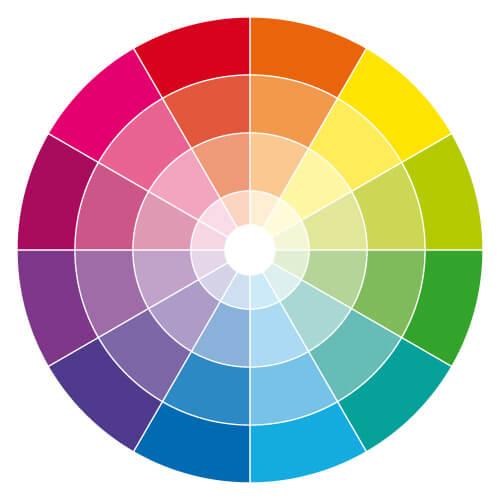
Wondering how to use a color wheel to find complimentary colors?
Here are a few tips:
- Pick two colors that are directly opposite each other
- Pick three colors that are equally spaced around the wheel, so that they form a triangle
- Pick two pairs of colors that are opposite each other, so that they form a rectangle
Do you find it difficult to create straight lines freehand?
You can use tape to help with this…
All you need to do is first paint your nails in one color, and then wait for this to dry completely. Observing a nail tech in action in a paid salon can help you replicate their work on yourself later on.
Then, place a small strip of tape across the part of the nail that you want to cover, painting in the rest of your nail with the complementary color you have chosen. Make sure that you press the tape down quite firmly, as you do not want there to be any air bubbles. It also helps to leave quite a bit of extra tape at the edges, so that you have something to grip on to when it comes time to remove the tape.
Once you are done, remove the strip of tape while your nails are still wet, as this will help to ensure that they dry with clean and straight edges.
Once it has all dried, apply a layer of top coat to lock this all in place.
You can use the tape method as often as you like on your nails, just make sure that each layer has dried thoroughly before applying the tape and the next layer.
It is always fun to experiment with nail art, allowing your nails to be an extension of your personality and really speak for themselves. Even if you are new to nail art, these designs are all easy to create, and they all also enable you to put your own spin on them, really making them your own.


Leave A Comment